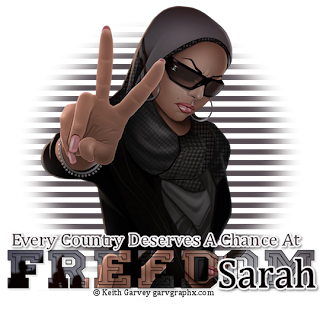
I wrote this tutorial as a way to acknowledge
all the countries which have & are fighting
for freedom of some sort. Every country has gone
through this or will face this.
Freedom
This tutorial was written
by Sarah Fiack on
February 9,2011
Any resemblance to another
tutorial is purely coincidental.
For this tutorial, I’m using
The art of Keith Garvey
This is a FTU he did as a gift
to the PSP community
Website
Supplies:
Tube & Image of choice.
No scraps needed
Blinds mask 1 by Monti
EyeCandy4000 Gradient Glow
Open a 600x600 new image.
Open up your tube & image of choice.
Select your font tool
& choose a font of choice.
Stroke width 1 Fill is closed off
Make sure your caps lock is on
& type out word of choice.
I used FREEDOM.
Convert to raster & move down
near the bottom of your tag.
Click inside the letters with
your magic wand tool.
Hold shift button down while doing
this to keep all the letters selected as you go.
Selections modify expand by 1
Paste your image as a new layer.
Arrange as wanted & Selections invert
& press delete.
Move under the letter outline layer.
Select none.
Add a drop shadow to the outline layer
2,2,50,5 black
Open your tube & resize if needed.
I resized 75% for the one I used.
Paste as new layer & arrange so that the
bottom part of the tube sits behind the letters.
Now select a different font but one that
can be easily read & type out the rest of
your text. I chose to use EVERY COUNTRY
DESERVES A CHANCE AT
Convert to raster & postion along the
top of your larger font.
Apply EyeCandy4000 Gradient glow
Setting Fat & glow width 3
Also add a drop shadow as well.
On the bottom layer,
add a new raster layer & fill with color of
choice. Apply the mask Montiblinds mask 1
I inverted it.
Merge group
Merge all layers visible &
resize 90%
Add copyright info & name.
Save as jpeg or png.
Thanks for trying my tutorial.

Great tut and tag. :)
ReplyDelete