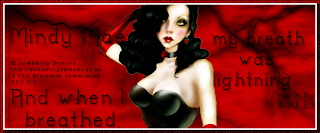
Sunday, December 27, 2009

Nature's Evening


Nature’s Evening

This tutorial was written
by Sarah Fiack on
Dec. 27, 2009.
Any resemblance to another
tutorial is purely coincidental.
For this tutorial, I’m using
The art of Kat NKDA
You need a license to use
The art can be purchased at
Her site here:
http://nkdigitalart.us/nkartshop.us/

Supplies
Tube of choice
Scrap of choice
I’m using one by KatNKDA called
Blue Moon Magic
It is a PTU kit.
Vix mask 248
Font Natalie

1) Open a 600x600 new image.
Choose a frame & resize as needed.
For the one I used I resized 78%
C&P as new layer onto new image.

2) Select inside frame with magic wand.
Selections modify expand by 3
C&P paper of choice as new layer.
Selections invert & press delete.
Move paper under frame layer.
Apply a rbbon or cityscape tube
Hit delete.
Select none.

3) Merge frame, ribbon & paper layers together
C&P main tube as new top layer.
Resize if needed. I resized 26% for the one I used.
Add a drop shadow
2,2,50,5 black

4) Open a candle tube.
Resize 70% or as needed.
C&P as new layer.
Position to the side behind main tube.
Duplicate once & mirror it.
Merge 2 candle tubes together & drop shadow.
5) Open roundish jewelry type element.
Resize as needed.
I resized 50 % & 70% once each.
C&P as new layer.
Position as needed.
Add drop shadow.

6) Paste paper of choice as new layer.
Apply vix mask 248
Merge group
Resize 115% or as wanted.

7) Open a flower.
Resize as needed.
I did 50% once & 70% twice.
C&P as new layer one on each side of frame.
Add drop shadows.

8) Resize all layers 88%.
Apply a wordart at this time or do your own saying
That fits your tag.
Add a drop shadow.

9) Add copyright info & name.
I applied a gradient glow to name but this is optional.
I used EyeCandy 4000 Gradient glow fat 3
Also did a drop shadow
Save as png or jpeg.
Thanks for trying my tutorial.

Sunday, December 20, 2009

New Year 2010


New Year 2010

This tutorial was written
by Sarah Fiack on
Dec.20, 2009.
Any resemblance to another
tutorial is purely coincidental.
For this tutorial, I’m using
The art of Keith Garvey
You need a license to use
his artwork which can be purchased at
mypsptubes.

Supplies:
Tube of choice
Scrapkit of choice
I’m using one by Naughty Creations
Called Red & Black 2010
This is a ptu scrapkit.
http://naughtys-creations.blogspot.com/
Eyecandy 4000 gradient glow

1) Open a 600x600 new image in psp.
Open a frame of choice &
Resize if needed.
C/p as new layer onto image.

2) Select inside your frame using magic wand.
If having to select multiple areas,
Hold shift down while selecting them with magic wand.
Selections modify expand by 2
C/p paper as new layer.
Selections invert & press delete.
Move paper under frame layer.

3) C/p a tube layer or close up as new layer
Between the frame & paper layer.
Press delete.
Add a drop shadow to both tube &frame layer
2,2,50,5 black

4) Take a lip kiss tube.
C/p as new layer.
Position on side of frame.
Add a gradient glow
Fat width 3
Add a drop shadow
Duplicate once & resize the copy 50%.
Move onto other side of frame.

5) Select a fireworks tube of choice.
C/p as new layer.
Position so that part of it shows past the frame.
Move to above bottom layer.
Duplicate once & move down or up as needed.
Move the two fireworks together & duplicate once.
Mirror.

6) Open a balloon of choice.
Resize 50% or as needed.
C/p as new layer onto tag.
Position on one side of tag as choice.
Add a drop shadow.

7) Paste regular tube of choice as new layer.
Position as wanted.
Add a drop shadow.

8) Open a mask & resize as needed.
I resized by 50% & 70% once each.
C/p as new layer.
Position as wanted & add drop shadow.

9) Add wordart of choice or make your own.
Add a drop shadow.

Sunday, December 13, 2009

Online Friends


Did this one since I know all of us have
online friends we hold dear & chat with regularly.
I know I hold my friends esp dear.


Online Friends

This tutorial was written
by Sarah Fiack on
Dec.13, 2009.
Any resemblance to another
tutorial is purely coincidental.
For this tutorial, I’m using
The art of Scott Blair
You need a license to use
his artwork which can be purchased at
mypsptubes.

Supplies
Tube of choice
Scrap of choice
I’m using a FTU one called
Digifriends.
It can be found at
Wimpychomperr
http://wimpychomperswonderwomen.blogspot.com
Eye Candy 4000 Gradient Glow

1) Open a 600x600 new image in psp.
Open a frame of choice & resize as wanted.
I resized 34%.
C/p as new layer.

2) Click inside middle of frame with magic wand.
If you need to select multiple areas,
Hold shift down while selecting to keep all areas selected.
Selections modify expand 3

3) Open a paper of choice.
Resize as needed.
I resized 17%.
C/p as new layer onto frame.
Selections invert & press delete.
Select none.
Move paper under frame.
Add drop shadow to frame layer
2,2,50,5 black

4) Copy & paste your tube as new layer.
Add the same drop shadow to it.
Open a button element & resize as needed.
I resized by 50% twice.
C/p as new layer.
Position as wanted on the frame.
Add a drop shadow.
I did this twice w/ 2 different buttons.

5) Open a mouse tube.
Resize as needed.
I resized by 50% twice & 70% once.
C/p as new layer.
Add drop shadow.

6) Choose some wordarts
Resize as needed.
I resized by 50% three times.
C/p as wanted.
Add eye candy 4000 gradient glow
Fat width 3
If needed.
Also add a drop shadow.

7) Open a heart element.
Resize as needed.
I resized 50% 3 times.
C/p as new layer.
Position as wanted,
I positioned under one of the wordarts.
Add a drop shadow.

8) X out background layer.
Merge visible rest of layers.
Duplicate once the merged layer.
On the bottom merged layer,
Adjust blur Gauassian blur 15
Effects texture effects
Glass

9) Resize all layers 88%
Add copyright info & name.
Save as jpeg or png.
Thanks for trying my tutorial.

Saturday, December 12, 2009

Masquerade


Masquerade

This tutorial was written
by Sarah Fiack on
Dec.12, 2009.
Any resemblance to another
tutorial is purely coincidental.
For this tutorial, I’m using
The art of Kat NKDA
You need a license to use
her artwork which can be purchased at
Her website.
http://nkdigitalart.us/nkartshop.us/

Supplies:
Tube of choice
Scrap of choice.
Im using one called Black Swan
Also by Kat NKDA.

1) Open a new 600x600 new image.
Open a frame of choice.
Resize as needed.
For the one I chose I resized 83%.
C/p as new layer.

2) Select inside the frame with magic
Wand or selection tool.
Open a paper of choice
& resize as needed.
I resized 30%.
C/p as new layer.
Selections invert & press delete.
Move paper layer under frame.

3) Open a bush/plant like element.
Resize by 80%.
C/p as new layer between paper & frame layers.
Press delete.
Select none.

4) Add a drop shadow
2,2,50,5 black
to both frame & bush tube.
Merge together the frame, paper & bush layers.
Duplicate the merged layer twice.
X out the top merged layer.
On the bottom one rotate 15 right
On the middle one rotate 15 left.
UN’x the top laeyer.

5) Open tube of choice.
Resize as needed.
I resized 63%.
C/p as new layer.

6) Open a flower tube.
Resize as needed.
I resized by 50% three times.
C/p as new layer.
Position on a corner of the frames.
Add the earlier drop shadow.

6) Open ballet slippers.
Resize by 50% twice.
C/p as new layer & position as wanted.
Add drop shadow.

7) Open a mask & resize 2-3 times.
C/p as new layer.
Position as wanted.
I put mine on the flowers.
Add a drop shadow.

8) Resize all layers 86%.
Add wordart of choice or one of your own.
Add a drop shadow.
Also add copyright info & name.
Save as jpeg or png.

Friday, December 11, 2009

Mothers Heart


Mother’s Heart

This tutorial was written
by Sarah Fiack on
Dec.11, 2009.
Any resemblance to another
tutorial is purely coincidental.
For this tutorial, I’m using
The art of Suzanne Woolcott
You need a license to use
His artwork which can be purchased at
Her website.
http://www.gorjussart.com/store/index.php

Supplies:
Tube of choice
Scrap of choice
I’m using a PTU one
Daughters Gift To Mom
By Naughty Creations
http://naughtys-creations.blogspot.com/

1) Open a 600x600 new image.
Open a frame of choice
C/p as new layer.

2) Select inside frame with magic wand.
Selections modify expand 2
C/p paper of choice from kit.
Selections invert & press delete.
Select none
Move paper under frame.

3) Now the heart frame I used as a border.
I filled it with a color from tube on a new layer.
This varies on the frame used.
If you do, just move the color fill layer under frame.
Adjust add noise
Monochrome 28
Add a drop shadow to the frame
2,2,50,5 black

4) Paste your tube once or twice depending on the tube.
Position as wanted on the tag. Now Back on frame layer,
Select the inside of the frame with magic wand
Selections modify expand 4
Now on your tube layer, selections invert
Press delete.
Select none.
Move under frame layer.

5) Open a wordart stone tile element.
Resize by 70% twice.
C/p as new layer & arrange on side of frame.
Add the earlier drop shadow.
Open a candle
Resize 50% twice.
C/p as new layer.
Position as wanted.
Add drop shadow.

6) Choose a bow from kit.
Resize 50% twice.
C/p as new layer & position as wanted.
Add a drop shadow as well.

7) X out the candle, stone, & background layers.
Merge visible the rest of the layers.
Duplicate once the merged layers.
Resize 50% the duplicated layer.
Arrange on side of the frame.
UN’X the other other layers.

8)Resize all layers 85%.
Add copyright info & name.
Save as jpeg or png.
Thanks for trying my tutorial.

Wednesday, December 9, 2009

Winter Angel


Winter Angel

This tutorial was written
by Sarah Fiack on
Dec. 8, 2009.
Any resemblance to another
tutorial is purely coincidental.
For this tutorial, I’m using
The art of Ismael Rac
You need a license to use
His artwork which can be purchased at
Artistic Minds, Inc.

Supplies
Tube of choice
Scrap of choice
I’m using a FTU one called
Faerie Blue Xmas
By Gothic Witch Creations
http://gothicwitchcreations.blogspot.com/2009/12/glam-n-glitter-blog-train.html
Vixmask 429

1) Open a 600x600 white new image.
Select a frame from scrapkit &
c/p as new layer onto new image.

2) Select inside the frame with magic wand.
Selections modify expand 5
Open a paper of choice.
C/p as new layer.
Selections invert & press delete.
Move paper under frame layer.

3) Paste your tube as new layer.
Make sure its under the frame layer.
Duplicate once.
Move the duplicated layer to top in layer palette.
X out the duplicated tube layer.
Back on the original, press delete.
Select none.

4) X out the original tube layer & Un’X the duplicate.
On the duplicate, erase the part of the tube that
Shows beyond bottom part of the frame.
Using your zoom in option under view can help on this part.
Once done, Un’X the original tube & add a drop shadow.
2,2,50,5 black to both frame & original tube layers.

5) Open star charm or one of choice.
Paste as new layer. Position around corner of frame.
Move to above background layer.
Duplicate once & mirror.
Add drop shadow to both charm layers.
Merge the two layers together & duplicate once
Then flip.
You should have charms showing at each corner of frame.

6) Open a snowflake of choice.
Resize by 50%.
Duplicate once.
Position the two snowflakes on the side of frame.
Add drop shadows.

7) Add a new raster layer above background layer.
Fill with color of choice from tube/tag.
Apply the Vixmask 429.
Merge group

8) Open an ornament of choice
Resize 50%.
Position on a snowflake.
Duplicate once & mirror.
Drop shadow both ornaments.

9) Open a swag & resize 50%.
c/p as new layer.
Position behind your tube near top of frame.
Add a drop shadow.

10) Resize tag by 88%.
Add copyright info & name.
Save as jpeg or png.
Thanks for trying my tutorial.

Sunday, December 6, 2009

Beautiful Winter


Beautiful Winter

This tutorial was written
by Sarah Fiack on
Dec. 6th, 2009.
Any resemblance to another
tutorial is purely coincidental.
For this tutorial, I’m using
The art of Kat NKDA
You need a license to use
The art can be purchased at
Her site here:
http://nkdigitalart.us/nkartshop.us/

Supplies:
Tube of choice
I’m using one called Ice Fairy by Kat
Scrap of choice
I’m using one called
Ice princess by Kat
Winter wordart by Vix
http://vixpsp.blogspot.com/2009/11/wordart-wintery.html

1) Open a 600x600 new image.
C/p a frame as new layer.
Resize by 65% or as needed.

2) Select inside of frame with magic wand
& modify by 3.
Open a paper & resize as needed.
I resized by 17%.
C/p paper as new layer.
Go to selections invert & press delete.
Select none.

3) Open tube of choice & resize as needed.
C/p as new layer.
Position as desired in frame.
Add a drop shadow to both tube & frame layers.
2,2,50,5 black.

4) Open a tree tube & resize as needed.
I resized by 73% & 85% once each.
C/p as new layer.
Position behind the frame & duplicate once.
Mirror the duplicated layer.
Drop shadow both tree layers.

5) Open an ice skates tube.
Resize by 60% twice.
C/p as new layer.
Position on top of frame & add drop shadow.

6) Open a leaves tube.
Resize by 50% & 60% once each.
C/p as new layer.
Flip once
Position so leaves show past the frame on bottom.
In layers palette move to bottom layer.
Duplicate once & mirror.

7) Open a crown type element.
Resize by 25% & 70% or as needed.
C/p as new layer.
Add a drop shadow.

8) Now on the crown element,
Select inside the center w/ magic wand.
Selections modify expand by 12.
C/p as new layer your tube.
Positon so part of it shows in the element.
Selections invert & delete.
Select none. Move tube under crown.

9) Resize all layers 88%.
Add wordart of choice.
Add a drop shadow as well.
Add copright info & name.
Thanks for trying my tutorial.