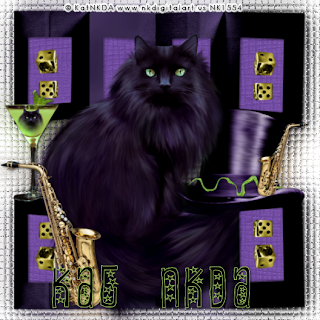
Mardi Gras Cat
This tutorial was written
by Sarah Fiack on
Jan. 26, 2010
Any resemblance to another
tutorial is purely coincidental.
For this tutorial, I’m using
The art of Kat NKDA
You need a license to use
her artwork which can be purchased at
Her website
Supplies:
Tube of choice
Scrap of choice.
Im using one by Kat NKDA
It’s a bundle of tube & scrapkit
Called Black Cat
1) Open a 600x600 new image.
Open frame of choice & resize as needed.
I resized 63%.
Paste as new layer.
2) Select a paper of choice.
Back on the frame layer, select
Inside the frame(s) with magic wand.
If selecting multiple areas;
Hold shift down while doing so to keep selected.
Selections modify expand 5
3)Resize paper of choice if needed.
I did 17%.
Copy & paste as new layer.
Selections invert & press delete.
Select none.
Move under frame layer.
4) Add a drop shadow to the frame layer
2,2,50,5 black
Copy & paste tube of choice.
Resize as needed.
I did 35% & 88% once each.
Add drop shadow.
5) Open dice tube.
Resize as needed.
I did 25%, 50% twice .
Paste as new layer.
Position as wanted.
I did in the frame and used my
Raster deform tool to rotate the dice.
Add a drop shadow.
6) Duplicate the dice tube once.
Mirror & position as wanted.
Now merge together the frame,
Paper & dice tube layers.
Not the background or main tube layers.
On the merged layer, duplicate once
& flip.
7)Open a top hat tube.
Resize by 50% twice & 70% once.
Position on top of the bottom frame.
Add a drop shadow.
7) Open a martini tube.
Resize as needed.
I did 50% twice.
Paste as needed.
Add a drop shadow.
8) Open a saxophone.
Resize as needed.
I did 50% & 40%.
Paste as new layer & position as wanted.
Duplicate once & mirror.
Resize 50%.
Position as wanted.
I did by the top hat.
9) Merge all layers visible except
Background layer.
Duplicate merged layer once.
On the bottom layer,
Adjust gauassian blur 17
Effects texture effects mosaic glass
10) Resize all layers 88%.
Add copyright info & name.
Save as jpeg or png.
Thanks for trying my tutorial.

No comments:
Post a Comment