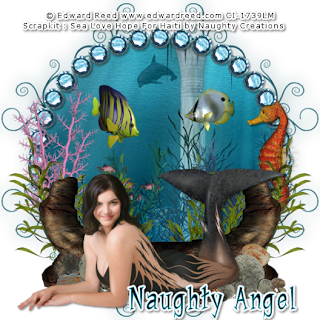
Sea Love
This tutorial was written
by Sarah Fiack on
Jan. 23, 2010
Any resemblance to another
tutorial is purely coincidental.
For this tutorial, I’m using
The artwork of Edward Reed which can
Be purchased at MPT
I purchased the tube I used while he was licensed at Cilm.
Supplies:
Tube of choice
Scrap of choice.
Im using one called Sea Love Hope For Haiti
By Naughty Creations
ArtisticVision
It is a charity kit which the profit from
Sales of it will go to charity for Haiti.
Font: Jawbox chanky
1) Open a 600x600 new image.
Paste your frame of choice as new layer
Onto the new image.
2) Click inside frame with magic wand.
Selections modify expand by 3
Paste paper of choice as new layer
Selections invert & press delete.
Move paper under frame layer.
Select none.
3) Paste tube of choice as new layer.
Add a drop shadow to both tube & frame layers.
2,2,50,5 black
Position tube as wanted.
4) Open a rock formation type tube of choice.
Resize as needed. I resized 50%.
Position as wanted behind your main tube.
Add drop shadow.
Duplicate once & mirror.
5) Choose a plantlife tube.
Resize 50% or as needed.
Position behind rock formation tube.
Duplicate once & mirror.
6) Choose a colorful plantlife.
Resize 50% or as needed.
Paste as new layer & position on one side
Of the frame behind rock & first plantlife.
Add a drop shadow.
Repeat this on the other side this time with a
Sealife tube.
7) I chose to add a couple more fish in the background at this point.
I resized them 50% and 70% once each.
Paste as new layer & position as wanted.
Add drop shadows.
8) Choose a line of rocks tube.
Resize if needed but I didn’t.
Paste as new layer & arrange behind your
Main tube but in front of your other rock formation tubes.
Add drop shadow.
9) Choose a doodle of choice.
Resize as needed I did 70%.
Paste as new layer.
Position so that part of it shows past the frame &
Above background layer.
10) Duplicate once & mirror.
Merge two doodle layers together.
Duplicate once & flip.
Merge all doodle layers together.
11) Duplicate doodles layer once.
On the bottom layer, go to adjust
Gauassian blur 15
Apply/hit okay.
12) Resize all layers 88%
Add copyright info & name.
Save as png or jpeg.
Thanks for trying my tutorial.

No comments:
Post a Comment