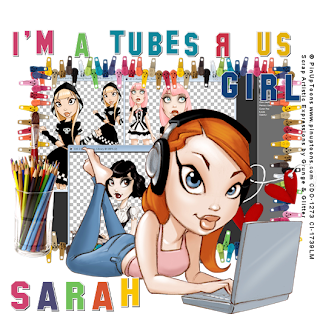
I decided to revamp a very old tutorial of mine.
I always liked the concept of it but it was done
very early in my tutorial writing.
Enjoy!!
Tubes R Us
This tutorial was written
by Sarah Fiack on
May 9, 2011
Any resemblance to another
tutorial is purely coincidental.
For this tutorial, I’m using
tubes by PinUpToons
You can purchase his tubes at
CDO
Some of the tubes were purchased
at Cilm when they were open.
Supplies:
Tube of choice
Scrap of choice.
I’m using one by Grunge & Glitter
Called Artistic Expressions
It is available at Pimp My Tags
with Scraps
Here
She is a guest designer at PMTw/S
Open a 600x600 new image.
Open four tubes of choice
& your scrap supplies.
Open a frame of choice.
Resize 85%
Paste as a new layer.
Rotate free rotate
left or right 90
Uisng your magic wand,
Select inside the frame.
Selections modify expand
by 2.
Open your tubes of choice
( not your main tube )
Arrange so you can see the
tubes in your psp workspace.
Take a screenshot of the
workspace & tubes.
This can be done by pressing
the PrtScn button on your
keyboard.
Paste as a new image.
Resize 40%
Now copy & paste as a
new layer into your frame.
Selections Invert & press delete.
Select none.
Move under the frame layer.
Now open your main tube.
Resize 88%
Paste as the new top layer.
Arrange near the bottom of your tag.
Open a glass of colored pencils
elements.
Resize 50%
Paste on a bottom corner of the tag.
Open your font tool.
Select a fun font of choice.
White stroke 1.0
I kept alternating the color
on the fill. I did a different color
for each word.
This is entirely optional.
Enlarge as wanted.
Convert to raster.
Now using your selection tool,
select around the R
( if using the same text I did )
copy & paste as a new image.
Mirror the R.
Back on the tag, delete the
original R. Paste as new layer
the mirrored R.
Add a drop shadow to all the
text layers.
1,1,100,1 Black
Oepn hearts on a string.
Resize 40%
Past behind your main tube
& to the side slightly.
Open a paintbrush &
resize 40%
Paste behind your colored pencils
so it appears to be coming up behind
the pencils.
Merge layers together.
Resize 88%
Add copyright info & name.
Save as png.
Thanks for trying my tutorial.

No comments:
Post a Comment