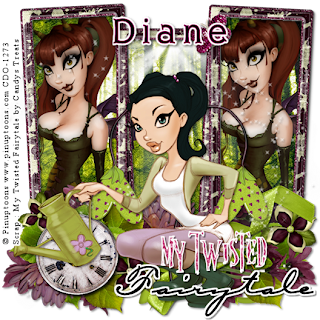
My Twisted Fairytale
This tutorial was written
by Sarah Fiack on
May 31,2011
Any resemblance to another
tutorial is purely coincidental.
For this tutorial, I’m using
2 tubes by Pinup Toons
You can purchase them at CDO
Supplies:
Tube of choice
Scrap of choice.
I’m using one by Candys Treats
Called My Twisted Fairytale.
It is available at Stargazers Scraps Here
Open a 600x600 new image.
Open your tube & scrap supplies.
Open a frame of choice.
Resize 88%
Paste as a new layer.
Using your magic wand,
select inside the frames.
Hold shift button down to select multiple
areas of the frame.
Paste a paper of choice as a
new layer.
Selections invert & press delete.
Move paper layer under the
frame layer.
Paste your tube twice between
the frame & paper layers.
Position the two tubes on either side
of the frame.
Left frame - 1 tube
right frame - 1 tube.
Press delete.
Select none.
On the 2 tube layers,
apply Xero Porcelain to the tubes
Softness 94
Strength 128
Brightness 128
Now paste your main tube as the top layer.
Position in the center frame of the frame.
Add a drop shadow to the tube
& frame layers.
2,2,50,5 black
Open a cloud fairylight element.
Paste as a new layer between the frame &
luminaced tubes layer.
You want the light to appear
to be coming in from behind the tubes.
Open a standing flower.
Resize 70%
Paste behind your main tube.
I arranged so the stem is behind the tube
but the flower is to the side.
Duplicate once & mirror.
Add a drop shadow.
Open some sparkle elements.
Resize 75%
Paste as a new layer under your main
tube layer in the layer palette.
Add a drop shadow.
Paste your wordart of choice
as a new layer.
Add a drop shadow to the wordart.
Merge layers visible.
Resize 88%
Add copyright info & name.
Save as png.
Thanks for trying my tutorial.

No comments:
Post a Comment