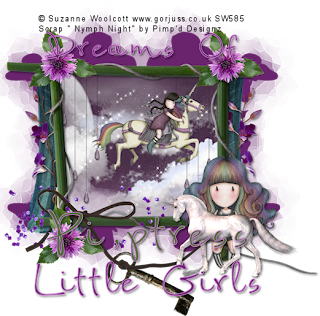
Dreams of little girls
This tutorial was written
by Sarah Fiack on
May 25, 2011
Any resemblance to another
tutorial is purely coincidental.
For this tutorial, I’m using
2 tubes by Suzanne Woolcott
Here
Supplies:
Tubes of choice
Scrap of choice.
Vixmask 32 Here
I’m using a scrap by Pimp'd Designz
called Nymph Night
It is available at Pimp My Tags
with Scraps
Here
Open a 600x600 new image.
Open your tube & scrap supplies.
Choose a frame of choice.
Resize if needed.
For the frame I chose I did not need
to resize.
Paste as a new layer.
Using your selection tool,
select around the center of the frame.
Paste a paper of choice as a new layer.
Selections invert & press delete.
Move the paper under the frame layer.
Open a moon element.
Paste between the two layers.
Position as wanted & press delete.
Open a clouds element.
Resize 68%
Paste as a new layer & press delete.
Select none.
Open hanging jewels.
Resize 35%
Paste to appear to be hanging from the inside of
the frame.
Add a drop shadow to the frame,
moon & clouds layer.
2,2,50,5 Black
Open tube 1
Resize 35%
Paste as a new layer under the frame layer.
You want it to apper to be in the sky.
Open a bow key element.
Resize 70%
Paste on the top layer & position on the bottom
part of the frame.
Open tube 2
Resize 50%
Paste in front of the bottom right
corner of the frame.
Add a drop shadow.
Open a horse element.
Resize 30%
Paste in front of tube 2.
Add a drop shadow.
Open a curtain element.
Resize 50% & 74% once each.
Paste as a new layer & move to
right side of the tag.
Move to the bottom layer of the tag.
You want the curtain visible as if
coming out from behind the frame.
Duplicate once & mirror.
You want to have curtain on either side
of the frame.
Repeat the above with a flower of choice as well.
You want the flowers to be in front of the curtain
layers.
Add a drop shadow to the flowers.
Open a corner flower.
Resize 35% & 80%
Paste on the 3 corners of the frame showing.
On the bottom layer of the tag.
add a new raster layer.
Fill with a color of choice from your tag.
Apply the Vixmask32
Merge group.
Duplicate the mask layer once
& flip. Position the two merged mask layers as
wanted on the tag.
Add wordart or saying of choice to your tag.
Convert to raster if needed.
Add a drop shadow.
Merge layers visible.
Resize 88%
Add copyright info & name.
Save as png.
Thanks for trying my tutorial.

No comments:
Post a Comment