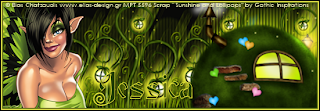
Fairy Lights
This tutorial was written
by Sarah Fiack on
August 19, 2010
Any resemblance to another
tutorial is purely coincidental.
For this tutorial, I’m using
The art of Elias Chatzoudis.
You can purchase his artwork at
MPT
Supplies:
Tube of choice.
Scrap of choice.
I’m using one by Gothic Inspirirations
Called Sunshine & Lollipops
It is a PTU kit.
Scrap
Open 600x200 new image
Open scrap supplies & tube of choice.
Fill the image with black or color of choice.
Resize hut tube 40%.
Paste on the tag on a side.
Open the lantern grass.
Resize 40%.
Paste as new layer under the hut layer.
Duplicate 3x.
Arrange along the length of the tag.
Select the background with magic wand.
Paste your tube on side opposite of hut.
On the tube layer, selections invert
& press delete.
Select none.
Merge togther the lantern grass layers
& the hut layer.
Duplicate together once.
On the bottom layer, adjust blur
motion blur strength 25
Effects texture effects blinds
Image add border size 2
I did 3 different border colors.
Resize all layers 90%.
Add copyright info & name
Save as jpeg or png.
Thanks for trying my tutorial.

OMG, I soooooooooo forgot how much I just love fairies and fantasy style stuffs. I collect fairies every year from the Renaissance Festival and this year I didn't make it, and was sad over it. This just lifted my spirits! Thank you so much! Love it.
ReplyDelete