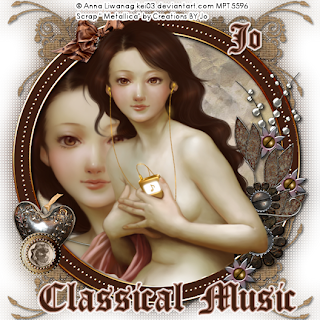
Classical Music
This tutorial was written
by Sarah Fiack on
April 20, 2010
Any resemblance to another
tutorial is purely coincidental.
For this tutorial, I’m using
The art of Anna Liwanag
You can purchase her artwork at
MPT
Supplies:
Tube & Closeup of choice
Scrap of choice
I’m using Metallica by
Creations By Jo.
It’s a PTU kit.
Scrap
Xero Porcleain
Eye Candy 4000 Gradient Glow
1) Open a 600x600 new image.
Select a frame of choice.
Resize 43% or as needed.
Paste as new layer.
Add drop shadow
2,2,50,5 black
2) Select inside of frame with magic wand.
If you need to select multiple areas, hold shift down
While selecting.
Selections modify expand by 2
Paste paper as new layer.
Selections invert & press delete.
Move paper under frame layer.
3) Paste tube closeup between frame & paper.
Press delete.
Select none.
Add drop shadow to the closeup layer.
Apply Xero Porcelain to the closeup
4) Open a wire heart element.
Resize 40% or as needed.
Paste as new layer & arrange on image.
Add drop shadow.
5) Open a button/brooch element.
Resize 40% or as needed.
Paste on one corner of the wire heart element.
Open a metallic heart.
Resize 15%.
Paste as new layer & position beneath the button tube.
Add a drop shadow.
6) On the frame I used I filled with a color
From my tube on the outside.
You can also do this with a paper of choice.
It is entirely optional as well.
7) Choose a bow & resize 25% or as needed.
Paste as new layer near top of frame.
Add a drop shadow.
8) Select a doodle of choice.
Resize 50% or as needed.
Selections select all float defloat.
Paste paper onto doodle as new layer.
Selections invert & press delete.
Select none.
9 ) Copy merged onto main image.
Position just above background layer.
So its peeking out on a corner from under the frame.
Duplicate once & mirror.
Merge the two layers together.
Duplicate once & flip.
Drop shadow all doodle layers.
9) Paste tube on top layer.
Using your eraser tool, erase any parts showing
Below the frame.
10) Merge layers visible.
Duplicate once.
On the bottom image, adjust
Blur
Gauassian blur 20
Effects texture effects weave
Add any word art you want at this time.
Add a gradient glow if wanted & a drop shadow.
11) Resize all layers 88%.
Add copyright info & name.
Thanks for trying my tutorial.

No comments:
Post a Comment