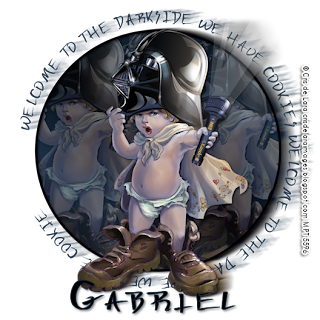
Darkside Cookies
This tutorial was written
by Sarah Fiack on
March 28, 2010
Any resemblance to another
tutorial is purely coincidental.
For this tutorial, I’m using
The art of Cris De Lara.
You can purchase her artwork at
MPT
Supplies:
Tube of choice
No Supplies
Just need psp
1) Open a 600x600 new image.
Select preset shape ellipse.
Width 5
Colors Stroke Black
Fill Null
Draw out a good sized circle.
Objects align
Center in canvas.
Convert to raster.
2) Click inside circle with magic wand.
Selections modify expand 2
Layers new raster layer.
Select 2 colors from tube.
Layers gradient
Foreground –background.
Fill new layer.
Move under frame circle.
3) Paste tube as new layer.
Position in center of circle.
Paste 2 more layers of the tube.
One on each side.
Merge the 3 tube layers together.
Selections invert & press delete.
Select none.
4) Lower the opacity on the 3 tubes to about
40.
Add a drop shadow of
2,2,50,5 black to tubes & frame layers.
5) Paste your main tube as new layer.
Position in center of circle.
Add a drop shadow.
6) Draw out a new circle with width 2
Stroke black
Fill null.
Draw it large enough so that it surrounds the
Earlier circle.
Do not convert to raster yet.
7) Select your text tool.
Position on the circle until the half moon shows
Under the A.
Type out
“ Welcome to the darkside we have cookies.”
Or a saying of choice.
Adjust as needed.
Once done, hide the circle.
Convert to raster.
8) Merge layers together.
Duplicate once.
On the bottom layer,
Adjust blur
Motion blur
Angle 80
Strength 50
9) Resize 88%.
Add copyright info & name.
Save as jpeg or png.
Thanks for trying my tutorial.

No comments:
Post a Comment