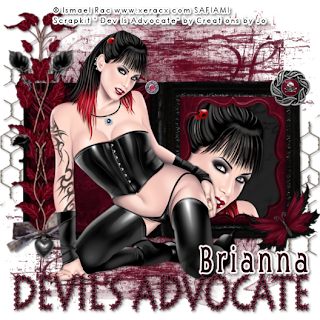
Devils Advocate
My tutorials are my original creations.
Any resemblance to another tutorial is entirely concidence.
For this tutorial I'm using the artwork of
Ismael Rac. To purchase his artwork please visit
Xeracx
Supplies:
This tutorial was written on
Jan. 9, 2010.
I'm using the scrapkit
by Creations by Jo called
Devils Advocate.
Scrap
wsl mask 221 Here
1)Open a 600x600 new image in psp.
Open frame of choice & resize as needed.
I resized 75%
Copy & paste as new layer.
Rotate if needed 90% either direction.
2) Select inside of frame with magic wand.
Selections modify expand by 3
Paste paper of choice as new layer.
Selections invert & press delete.
Move paper under frame.
3) Paste tube of choice as new layer.
I resized the tube 80%.This may vary on frame & tube.
Make sure its between your paper & frame layers.
Press delete. Select none.
Add a drop shadow to both frame & tube layers
2,2,50,5 black.
4)Open flower leaves type tube.
Resize by 88% three times.
Paste as new layer on side of frame.
Duplicate once & mirror. Arrange by original
leaf tube.
Add drop shadow to both.
5) Open a bow tube & resize as needed.
I resized by 25% once & 75% twice.
Paste as new layer.
Arrange at bottom of the flower leaf tube.
Add a drop shadow.
6) Choose a swag curtain type tube.
Paste as new layer & move behind the flower
leaf tube in layer palette.
Arrange so that it appears to be hanging
from the frame. Add a drop shadow.
7) Take a chain link tube.
resize as needed. I resized 47%.
Paste as new layer above background layer.
Duplicate once, mirror & then flip.
Add drop shadows to both.
8) Choose a butterly tube.
resize by 50% & 70% once each.
Open another one in a different color
& resize this time by 40% & 70%.
Arrange on top of the previous butterfly.
Merge the two together.
9) Use your raster deform tool to turn the butterflies
to which ever direction you perfer. Resize 65%.
Arrange on a corner of the frame.
Add a drop shadow.
10) Open main tube. Resize 88% or as needed.
Paste as new layer. Make sure its top layer in
layer palette.
11) Paste paper of choice as new layer above
background layer. Apply wsl mask 221.
Merge group.
12) Open a button element & resize 50%.
Paste on the one corner without anything.
Add a drop shadow.
13) Resize all layers 88%.
Merge Visible.
Add any wordart you want at this point.
I used one found in the scrapkit & resized it by 88%.
Added a drop shadow as well.
14) Add copyright info & name.
Save as jpeg or png.
Thanks for trying my tutorial.

No comments:
Post a Comment