Showing posts with label Fairytales. Show all posts

Saturday, October 8, 2011

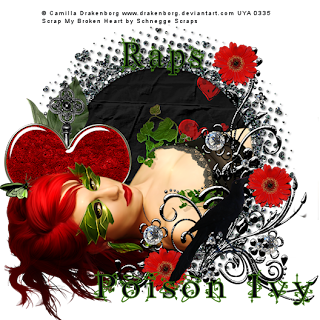
Poison Ivy


Poison Ivy

This tutorial was written
by Sarah Fiack on
October 8, 2011
Any resemblance to another
tutorial is purely coincidental.
For this tutorial, I’m using
a tube by Camilla Drakenborg.
You can purchase her tubes at
Up Your Art Here


Supplies:
Tube of choice
Scrap of choice.
I am using a PTU scrap
by Schnegge's Scraps called
My Broken Heart
Blog

Open a 600x600 new image.
Open up your tube & scrap supplies.

Open a frame of choice &
paste as a new layer.
Click inside the center of the frame
with the magic wand.
Selections modify expand by 5.

Paste a paper of choice.
Selections invert & press delete.
Move the paper under the frame layer.

Paste your tube between the two
layers. Position as wanted.
Duplicate the tube once.
Move the tube copy layer to the
top in your layer palette.

Back on the original tube, press delete.
Select none.
On the tube copy layer, erase the parts
of the tube showing past the frame which
you do not want visible.It may help if you lower
the opacity to see the frame through the tube layer
while erasing.

Add a drop shadow to the frame
& original tube layers.
2,2,50,5 Black.

Open a doodle element.
Paste on the side of the frame
opposite of the tube.

Open a flower element.
Resize 50% twice.
Paste on the doddle three times
in different places.

Open a heart embellishsment.
Paste behind your 2nd tube layer.
You want the heart to appear behind the tube.

Open a key element.
Paste behind the heart layer.
Arrange so the key is coming up
behind the center of the heart layer.

Open a leaf branch.
Resize 70%
Paste behind the key layer on the tag.

Open a bird element.
Resize 60%
Paste as wanted on the doodle.

Add wordart or saying of choice.
Add a drop shadow to the text.

Merge layers visible.
Resize 88%

Add copyright info & name.
Save as png.
Thanks for trying my tutorial.

Saturday, July 2, 2011

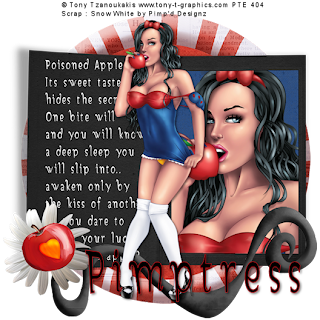
Poisoned Apple


Poisoned Apple

This tutorial was written
by Sarah Fiack on
July 2, 2011
Any resemblance to another
tutorial is purely coincidental.
For this tutorial, I’m using
a tube by Tony Tzanoukakis
You can purchase this tube at
PTE

Supplies:
Tube of choice
Scrap of choice.
I’m using one by Pimp'd Designz
called Fairytale Snow White.
It is part of a Fairytale Collab
It is available at Pimp My Tags
with Scraps
Here

Open a 600x600 new image.
Open your tube & scrap supplies.

Choose a frame of choice.
Resize 90%.
Paste as a new layer.

Using your selection tool,
draw around the inside
part of the frame.

Paste a paper of choice
as a new layer.
Selections invert & press delete.
Move the paper under the frame layer.

Now paste your tube closeup
as a new layer between the two layers.
Position as wanted & press delete.
Now select none.

Add a drop shadow to the
closeup layer.
2,2,50,5 Black.

Open a round circle frame.
Resize 88% & 95% once each.
Paste on the bottom layer of
the tag.

Click inside the circle frame with
your magic wand tool.
Selections modify expand by 5.

Paste a paper of choice.
Selections invert
Press delete button.
Move paper under the frame.
Select none.

Open a flower & an apple element.
Resize both 50%
Paste the flower on a bottom corner
of frame 1.
Paste the apple on top of the flower.

On frame 1, I added some
text based on the story of Snow White.
Add any text which goes with the tag
you are creating.

Paste your main tube
as a new layer on top layer
of the tag.
Position in center of the tag.
Add a drop shadow.

Open a doodle swirl.
Resize 75%
Paste at bottom of the tag.

Merge layers visible.
Resize 88%.
Add copyright info & name.
Save as png.
Thanks for trying my tutorial.

Tuesday, June 21, 2011

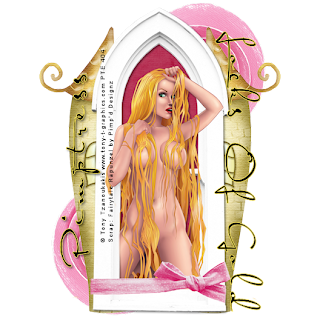
Locks Of Gold


Locks Of Gold

This tutorial was written
by Sarah Fiack on
June 21, 2011
Any resemblance to another
tutorial is purely coincidental.
For this tutorial, I’m using
a tube by Tony Tzanoukakis
You can purchase this tube at
PTE

Supplies:
Tube of choice
Scrap of choice.
I’m using one by Pimp'd Designz
called Fairytale Rapunzel.
It is part of a Fairytale Collab
It is available at Pimp My Tags
with Scraps
Here

Open a 600x600 new image.
Open your tube & scrap supplies.

Open a tower window.
Resize 88%
Paste as a new layer.

Click inside the frame with
your magic wand tool.
Hold shift button down
to select multiple areas.

Selections modify expand
by 3.
Paste a paper of choice
as a new layer.
Selections invert & press delete.
Move the paper under the frame layer.

Paste your tube between the
two layers.
Duplicate the tube layer once.
Move the tube copy layer to
the top in the layer palette.

On the original tube layer,
press delete.
Select none.

Add a drop shadow to
the original tube & frame layers.
2,2,50,5 Black.

On the tube copy layer,
erase the parts showing
past the frame.

Open a flower element of choice.
Paste on bottom layer of the tag.
Position either at the top
or bottom of the tag.

Duplicate the flower once.
Mirror & flip it.

Open another tower element.
Resize 85% twice.
Paste behind slightly to side
of the frame layers.
Duplicate once & mirror.

Open a horizontal ribbon.
Resize 50% twice & 85% once.
Paste near the bottom of the frame.

Add any text you wish for the tag.
Convert to raster.
Rotate free rotate right 90.
Add a drop shadow to the text.

Merge all layers viisble.
Add copyright info & name.
Save as png.
Thanks for trying my tutorial.

Sunday, June 5, 2011

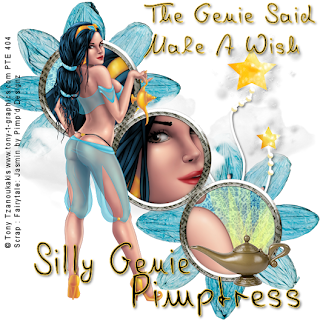
Silly Genie


Silly Genie

This tutorial was written
by Sarah Fiack on
June 5, 2011
Any resemblance to another
tutorial is purely coincidental.
For this tutorial, I’m using
a tube by Tony Tzanoukakis.
It was a Limited Edition tube
available at PTE

Supplies:
Tube of choice
Scrap of choice.
I’m using one by Pimp'd Designz
called Fairytale Jasmin.
It is part of a Fairytale Collab
It is available at Pimp My Tags
with Scraps
Here
Xero Porcelain Plugin

Open a 600x600 new image.
Open up your tube, closeup & scrap supplies.

Open a frame of choice.
Resize 88%
Paste as a new layer.
Rotate free rotate right 45.

Click inside the frame with your magic wand.
If selecting inside multiple parts of
the frame, hold shift button down
while selecting.
Selecitons modify expand 3

Paste a paper of choice
as a new layer.
Selections invert & press delete.
Move the paper layer under the
frame layer in your layer palette.

Paste your tube closeup as
a new layer between the two layers.
Press delete.
Paste a firelight in the bottom frame
under the closeup layer.
Press delete.
Select none.

Addd a drop shadow to the
close up & frame layers.
2,2,50,5 Black

On your tube closeup layer,
apply Xero Porcelain
Softness 76
Strength & Brightness both 128

Paste your full length tube as a new layer by
the frame.
Open standing stars.
Resize 75% & mirror
Paste on the bottom layer.
Arrange so the stars appear to be
coming from the frame.
Add a drop shadow to the stars.

Open a flower element.
Paste on the bottom layer & arrange
one under the top part of the frame.
Arrange the 2nd one under the bottom
part of the frame.

Open a cloud element.
Paste under the middle part of the frame
between the two flowers.

Open a genie lamp elemet.
Resize 50% & 80% once each.
Paste in front of the bottom frame.

Merge layers visible.
Add wordart or saying of choice.
Make sure to add a drop shadow to the text.

Resize all layers 88%
Add copyright info & name.
Save as png format.
Thanks for trying my tutorial.

Tuesday, May 31, 2011

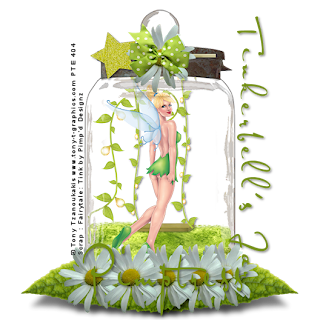
Tinkerbell's Jar


Tinkerbell's Jar

This tutorial was written
by Sarah Fiack on
May 31, 2011
Any resemblance to another
tutorial is purely coincidental.
For this tutorial, I’m using
a tube by Tony Tzanoukakis.
It was a Limited Edition tube
available at PTE

Supplies:
Tube of choice
Scrap of choice.
I’m using one by Pimp'd Designz
called Fairytale Tink.
It is part of a Fairytale Collab
It is available at Pimp My Tags
with Scraps
Here


Open a 600x600 new image.
Open up your tube & scrap supplies.

Choose a jar element.
Resize 85%
Paste as a new layer.

Click inside the jar with
your magic wand tool.

Paste a grass element.
Position near the bottom
of the jar.
Selections invert & press delete.
Move the grass under the jar layer.

Duplicate the grass layer once.
Move the copy layer down slightly
in the jar.

Open a vine element.
Resize 80%
Paste under the jar layer.
Press delete.
You want the vine to appear to
hang down on the inside of the jar.

Open a leaf swing element.
Resize 50%
Paste inside the jar.
Press delete.
Select none.

Add a drop shadow to the swing.
2,2,50,5 black
Open your main tube.
Resize 70%
Paste inside the jar.

Now merge the jar layers together.
Resize the jar 85%

Open a leaf.
Paste it once under the jar layer.
You want to position it at the bottom
of the jar. Duplicate once & mirror.

Open a daisy or flower.
Resize 45%
Paste along the bottom of the jar
on the leaves. You also want to paste
a flower at the top of the jar lid.

Open a bow.
Resize 30%
Paste at the top of the jar
on the flower.

Open the wand element.
Resize 50%
Rotate either direction 90
Paste under the bow & flower
on the jar's lid.
Add a drop shadow to the wand.

Add wordart or saying of choice.
Rotate either direction 90.
Move so that is along the side
of the jar.
Add a drop shadow.

Merge layers visible.
Resize 88%
Add copyright info & name.
Save as png format.
Thanks for trying my tutorial.

Sweet Dreams


Sweet Dreams

This tutorial was written
by Sarah Fiack on
May 31, 2011
Any resemblance to another
tutorial is purely coincidental.
For this tutorial, I’m using
a tube by Tony Tzanoukakis
You can purchase this tube at
PTE

Supplies:
Tube of choice
Scrap of choice.
I’m using one by Pimp'd Designz
called Sleeping Beauty.
It is part of a Fairytale Collab
It is available at Pimp My Tags
with Scraps
Here

Open a 600x600 new image.
Open your tube, closeup & scrap supplies.

Choose a frame of choice.
Paste as a new layer.

Click inisde the frame with your
magic wand tool.
Selections modify expand by 10

Paste a paper of choice.
Selections invert & press delete.
Move the paper under the frame layer.

Paste your tube closeup between the
two layers. Position as wanted.
Press delete.
Select none.

Add a drop shadow to the close up layer
& the frame layer.
2,2,50,5 Black

Open your main tube & paste
it along the bottom of your frame.

Open a ribbon with hanging stars.
Resize 85% & 95% once each.
Position on the tag so that it lays under your
main tube layer.

Open a heart element.
Mirror it once.
Paste under your main tube layer.
Position on the tag so the heart appears
to be under the head of your main tube.

Open mist/smoke/cloud element.
Resize 80%
Paste on bottom layer of the tag.
Arrange on both sides of the frame.

Add wordart or saying of choice.
Make sure you add a drop shadow to
the text you choose.

Merge layers visible.
Resize 88%
Add copyright info & name.
Save as png.
Thanks for trying my tutorial.

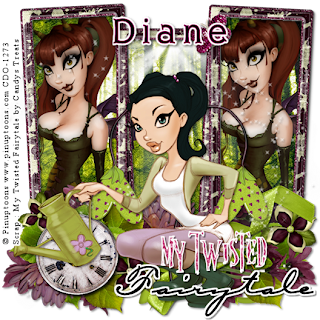
My Twisted Fairytale


My Twisted Fairytale


This tutorial was written
by Sarah Fiack on
May 31,2011
Any resemblance to another
tutorial is purely coincidental.
For this tutorial, I’m using
2 tubes by Pinup Toons
You can purchase them at CDO

Supplies:
Tube of choice
Scrap of choice.
I’m using one by Candys Treats
Called My Twisted Fairytale.
It is available at Stargazers Scraps Here

Open a 600x600 new image.
Open your tube & scrap supplies.

Open a frame of choice.
Resize 88%
Paste as a new layer.

Using your magic wand,
select inside the frames.
Hold shift button down to select multiple
areas of the frame.

Paste a paper of choice as a
new layer.
Selections invert & press delete.
Move paper layer under the
frame layer.

Paste your tube twice between
the frame & paper layers.
Position the two tubes on either side
of the frame.

Left frame - 1 tube
right frame - 1 tube.
Press delete.
Select none.

On the 2 tube layers,
apply Xero Porcelain to the tubes
Softness 94
Strength 128
Brightness 128

Now paste your main tube as the top layer.
Position in the center frame of the frame.
Add a drop shadow to the tube
& frame layers.
2,2,50,5 black

Open a cloud fairylight element.
Paste as a new layer between the frame &
luminaced tubes layer.
You want the light to appear
to be coming in from behind the tubes.

Open a standing flower.
Resize 70%
Paste behind your main tube.
I arranged so the stem is behind the tube
but the flower is to the side.
Duplicate once & mirror.
Add a drop shadow.

Open some sparkle elements.
Resize 75%
Paste as a new layer under your main
tube layer in the layer palette.
Add a drop shadow.

Paste your wordart of choice
as a new layer.
Add a drop shadow to the wordart.

Merge layers visible.
Resize 88%
Add copyright info & name.
Save as png.
Thanks for trying my tutorial.
Wednesday, May 25, 2011

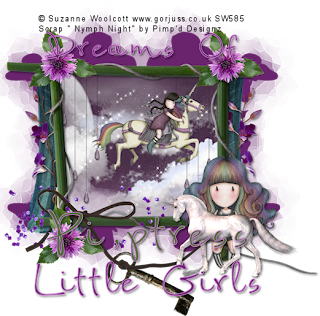
Dreams Of Little Girls


Dreams of little girls

This tutorial was written
by Sarah Fiack on
May 25, 2011
Any resemblance to another
tutorial is purely coincidental.
For this tutorial, I’m using
2 tubes by Suzanne Woolcott
Here

Supplies:
Tubes of choice
Scrap of choice.
Vixmask 32 Here
I’m using a scrap by Pimp'd Designz
called Nymph Night
It is available at Pimp My Tags
with Scraps
Here

Open a 600x600 new image.
Open your tube & scrap supplies.

Choose a frame of choice.
Resize if needed.
For the frame I chose I did not need
to resize.
Paste as a new layer.

Using your selection tool,
select around the center of the frame.
Paste a paper of choice as a new layer.
Selections invert & press delete.
Move the paper under the frame layer.

Open a moon element.
Paste between the two layers.
Position as wanted & press delete.

Open a clouds element.
Resize 68%
Paste as a new layer & press delete.
Select none.

Open hanging jewels.
Resize 35%
Paste to appear to be hanging from the inside of
the frame.

Add a drop shadow to the frame,
moon & clouds layer.
2,2,50,5 Black

Open tube 1
Resize 35%
Paste as a new layer under the frame layer.
You want it to apper to be in the sky.

Open a bow key element.
Resize 70%
Paste on the top layer & position on the bottom
part of the frame.

Open tube 2
Resize 50%
Paste in front of the bottom right
corner of the frame.
Add a drop shadow.

Open a horse element.
Resize 30%
Paste in front of tube 2.
Add a drop shadow.

Open a curtain element.
Resize 50% & 74% once each.
Paste as a new layer & move to
right side of the tag.

Move to the bottom layer of the tag.
You want the curtain visible as if
coming out from behind the frame.
Duplicate once & mirror.
You want to have curtain on either side
of the frame.

Repeat the above with a flower of choice as well.
You want the flowers to be in front of the curtain
layers.
Add a drop shadow to the flowers.

Open a corner flower.
Resize 35% & 80%
Paste on the 3 corners of the frame showing.

On the bottom layer of the tag.
add a new raster layer.
Fill with a color of choice from your tag.
Apply the Vixmask32
Merge group.

Duplicate the mask layer once
& flip. Position the two merged mask layers as
wanted on the tag.

Add wordart or saying of choice to your tag.
Convert to raster if needed.
Add a drop shadow.

Merge layers visible.
Resize 88%
Add copyright info & name.
Save as png.
Thanks for trying my tutorial.
Wednesday, March 16, 2011

Time To Dream


Time to dream

This tutorial was written
by Sarah Fiack on
March 15, 2011
Any resemblance to another
tutorial is purely coincidental.
For this tutorial, I’m using
a tube by Zindy S.D. Nielsen
You can purchase this tube at
her storeSupplies

Tube of choice.
Scrap of choice.
I’m using one by designs by sarah
Called Wonderland
It is available at Pimp My Tags
with Scraps
Here
Mask by weescottlass wslmask 145
Here
Open a new 600x600 new image.
Open up your tube & scrap supplies.

Choose a frame of choice.
I used a rectangle one.
Resize 80% or as needed.
Paste as a new layer.

Select the areas of the frame with magic wand.
Hold shift down to select multiple areas.
Paste a paper of choice.
Selections invert & press delete.
Move paper under the frame.

Paste your tube between the frame & paper layers.
Duplicate once.
Move the tube copy layer to top in layer palette.
Back on the original tube layer, press delete.
Select none.

On the tube copy layer,
erase the parts of the tube showing past the frame.
Add a drop shadow to the original tube layer.

Open a branch with flower petals.
Resize 50%
Paste on the bottom layer & position to the side.
Duplicate once & mirror.

Arrange so that the branches appear from under the
layers & are "hanging" from the frame layers.

Open a clock element.
Resize 50% & arrange on tag
to hang from the bottom of frame.
Open a mushroom grass element.
Paste on the top layer of the tag
so that it is over the very top of the clock.

Merge layers visible.
Add a new raster layer on the bottom.
Fill with color of choice from tag.
Apply wsl mask145
Merge group

Add wordart or saying of choice to
the tag. Make sure to add a drop shadow
to the wordart.

Resize all layers 88%
Add copyright info & name.
Save as jpeg or png.
Thanks for trying my tutorial.
Friday, February 25, 2011

Dance In The Flowers


Dance In The Flowers

This tutorial was written
by Sarah Fiack on
Febryary 25, 2011
Any resemblance to another
tutorial is purely coincidental.
For this tutorial, I’m using
a tube which comes with the scrapkit.

Supplies:
No tube is needed outside of the scrap
Scrap of choice.
I’m using one by PolkaDot Scraps
Called Center Stage
It is available at Pimp My Tags
with Scraps
Here


Open a 600x600 new image.
Open your scrap supplies.

Choose three flowers.
Paste as new layers.
Arrange on the tag as wanted.
I did two of each flower.

Open a tube of choice.
I used one which comes with the
scrap.
Resize 80%
Paste as a new layer on top of
the flower layers.

Add a drop shadow to the
tube layer
2,2,50,5 black

Choose some smaller flowers
which appear to be falling.
Resize them 70%
Paste as a new layer & arrange
slightly to side & behind the main tube.

Open leaves branch.
Resize 70%
Paste on the bottom layer.
Arrange so the leaves are near bottom & come out from
behind the flowers. Duplicate once & mirror.

Repeat the above with a second leaf branch.
Arrange this one near the top of the flowers.

Open a hanging bird perch.
Resize 75%
Arrange to side of the tube.
Add the earlier drop shadow.
Arrange the perch between the flower layers.
You want it to appear to be coming out from the flowers.

Open a standing flower & resize 50%
Paste near the bottom of the flowers.
I did one on each side of the main tube.
Drop shadow the flowers.

Open a branch ribbon.
Paste near bottom of tag in front
of your main tube.

Resize the layers 88%
Add wordart of choice or a saying
of your own which I have done.
Convert to raster & add a drop shadow.

Merge layers together.
Add copyright info & name.
Save as jpeg or png.
Thanks for trying my tutorial.

Friday, July 16, 2010

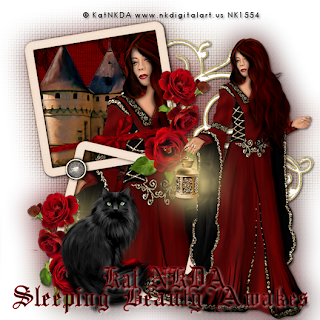
Sleeping Beauty


Sleeping Beauty

This tutorial was written
by Sarah Fiack on
July 16, 2010.
Any resemblance to another
tutorial is purely coincidental.
For this tutorial, I’m using
The art of Kat NKDA
You need a license to use
The art can be purchased at
Her site here:
KATNKDA

Supplies
3 Tubes of choice
Scrap of choice
I’m using one by KatNKDA called
Sleeping Beauty
It is a PTU kit.

Open a 600x600 new image.
Open tubes & scrap supplies of choice.

Open a two square frame
Resize 45%
Paste as new layer & move
to side of your tag image.
Add a drop shadow
2,2,50,5 Black

Select inside the frame with
magic wand.
Selections modify expand 7

Open paper of choice
Resize 50%
Paste as new layer
selections invert & press delete.
Move paper under frame

Open the castle tube.
Resize 40%
Paste in the frame & arrange.
Add a drop shadow

Open tube.
Resize 40%
Paste as new layer & arrange
between paper & frame.
Press delete.
Select none.
Add a drop shadow

Open a doodle from kit.
Resize 30%
Paste as new layer
Mirror
Arrange so its coming out from
behind the frame layers.
Add a drop shadow

Open main tube
resize 27%
Paste as new layer on side of frame
add a drop shadow.

Open a bow
Resize 10%
Paste on frame.
Rotate left 10
Erase parts of bow showing past the frame
Add a drop shadow
Duplicate once - Mirror
arrange on the other frame.

Open 3 rose bunch
Resize 15%
Paste as new layer
Arrange on the frame
Duplicate once & mirror
Arrange on spot.
Drop shadow both

Open Cat tube
Resize 15% or as needed.
Paste as new layer near bottom of tag.
Add a drop shadow

Merge layers visible
Duplicate once
On bottom layer,
Adjust Blur Gauassian 25
Effects Texture Weave

Resize all layers 88%.
Add wordart or saying of choice to image.
Add a drop shadow of choice.

Add copyright info & name.
Save as jpeg or png
Thanks for trying my tutorial

Thursday, June 10, 2010

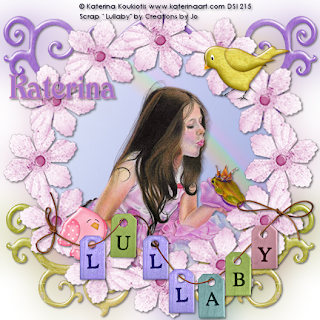
Lullaby Kiss


Lullaby Kiss

This tutorial was written
by Sarah Fiack on
June 9, 2010
Any resemblance to another
tutorial is purely coincidental.
For this tutorial, I’m using
The art of © Katerina Koukiotis
www.katerinaart.com
You can purchase her artwork at
Dreamscape


Supplies:
Tube & Image of choice
Scrap of choice
I’m using Lullaby by
Creations By Jo.
It’s a PTU kit.
Available at Dreamscape
Muras Meister Copies

Open a 600x600 new image.
Open tube & kit supplies as well.

Choose a flower from the kit.
Resize 15% and paste as new layer
Apply Muras Meister Copies plug in
Encircle
Resize the flower frame layer 150%

Click inside the frame with magic wand
Selections modify adjust expand 7
Paste paper of choice as new layer
Selections invert & press delete.
Move layer under frame.

Paste main tube between frame & paper.
Press delete.
Add a drop shadow to both tube & frame.
2,2,50,5 Black

Choose a doodle from kit.
Resize 50%.
Paste as new layer & arrange under paper layer.
Duplicate once & mirror.
Drop shadow both.layers.
Repeat the above just with a different color doodle.

Open birds of choice.
Resize 50%.
Paste on frame as wanted.
Add drop shadows

Open the lullaby wordart included in kit.
Resize 50%.
Paste as new layer
Arrange near bottom of tag.
Add a drop shadow

Merge layers visible.
Duplicate once.
On the bottom layer,
Adjust blur gauassian blur 27

Resize all layers 88%.
Add copyright info & name.
Save as jpeg or png.
Thanks for trying my tutorial