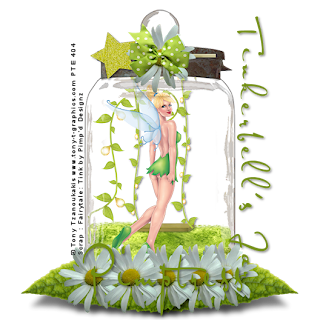
Tinkerbell's Jar
This tutorial was written
by Sarah Fiack on
May 31, 2011
Any resemblance to another
tutorial is purely coincidental.
For this tutorial, I’m using
a tube by Tony Tzanoukakis.
It was a Limited Edition tube
available at PTE
Supplies:
Tube of choice
Scrap of choice.
I’m using one by Pimp'd Designz
called Fairytale Tink.
It is part of a Fairytale Collab
It is available at Pimp My Tags
with Scraps
Here
Open a 600x600 new image.
Open up your tube & scrap supplies.
Choose a jar element.
Resize 85%
Paste as a new layer.
Click inside the jar with
your magic wand tool.
Paste a grass element.
Position near the bottom
of the jar.
Selections invert & press delete.
Move the grass under the jar layer.
Duplicate the grass layer once.
Move the copy layer down slightly
in the jar.
Open a vine element.
Resize 80%
Paste under the jar layer.
Press delete.
You want the vine to appear to
hang down on the inside of the jar.
Open a leaf swing element.
Resize 50%
Paste inside the jar.
Press delete.
Select none.
Add a drop shadow to the swing.
2,2,50,5 black
Open your main tube.
Resize 70%
Paste inside the jar.
Now merge the jar layers together.
Resize the jar 85%
Open a leaf.
Paste it once under the jar layer.
You want to position it at the bottom
of the jar. Duplicate once & mirror.
Open a daisy or flower.
Resize 45%
Paste along the bottom of the jar
on the leaves. You also want to paste
a flower at the top of the jar lid.
Open a bow.
Resize 30%
Paste at the top of the jar
on the flower.
Open the wand element.
Resize 50%
Rotate either direction 90
Paste under the bow & flower
on the jar's lid.
Add a drop shadow to the wand.
Add wordart or saying of choice.
Rotate either direction 90.
Move so that is along the side
of the jar.
Add a drop shadow.
Merge layers visible.
Resize 88%
Add copyright info & name.
Save as png format.
Thanks for trying my tutorial.

No comments:
Post a Comment