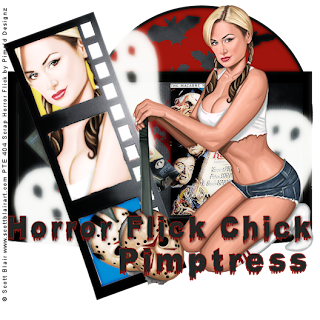
Horror Flick Chick
This tutorial was written
by Sarah Fiack on
October 11, 2011
Any resemblance to another
tutorial is purely coincidental.
I am using a tube by Scott Blair.
You can purchase this tube at
PTE
Supplies:
Tube of choice.
Scrap of choice.
I’m using one by Pimp'd Designz
called Horror Flick.
It is available at Pimp My Tags
with Scraps
Here
Plugin:
Xero Radiance
Open a 600x600 new image.
Open your tube & scrap supplies.
Choose a television frame.
Resize 95%
Copy & paste as a new layer.
Click inside the frame with
your magic wand tool.
Selections modify expand by 4.
Paste a paper of choice
Selections invert & press
delete. Move paper layer
under tv layer.
Select none.
Open a blood splatter element.
Resize 88%
Paste on the tv screen background.
Open a movie poster.
Resize 50% Paste on
the tv screen.
Open a 2nd movie poster.
Repeat the above step.
This time after you paste the
pster, rotate free rotate 45
Left. Position as wanted on the tv.
Select your ellipse preset shape tool.
Stroke Black Fill red width 5.
Draw out a good sized circle.
Convert to raster.
Move the circle on the bottom layer.
You want it to be on the right side
behind the frame.
Open your main tube.
Paste on the top layer.
Position by the side with
the circle element.
Open a film frame element.
Resize 80%
Fill each square with a different color.
I did yellow,red & blue but the colors
are your choice.
On the small squares of the frame I filled
with white color.
Click inside the large squares of the frame.
Selections modify expand by 2.
Paste your tube of choice into the squares.
Selections invert & press delete.
Select none.
Merge the film frame layers together.
Rotate free rotate Left 20
Move on the left side of the tag.
Open a ghost element.
Resize 70%
Paste on on the upper right
side of the film frame
& a 2nd ghost on the bottom left side.
I arranged the ghost so that they
appear to be appearing from coming from
behind the film frame layer.
Mirror the ghost element.
Paste behind your main tube.
Open flying bats element.
Resize 50%
Position on the tag in front of
the red circle layer.
X out your main tube so that
it is hidden. Merge visible the
rest of the tag layers.
On the merged layers,apply
Xero Radiance
Strangeness 49
Charm 50
Truth 128
Beauty 255
Now unhide your main tube layer.
Choose your font tool.
Select a font of choice.
Stroke Red Fill black
stroke width 1.0
Type out your words of choice.
Enlarge as wanted.
Convert to raster.
Add a drop shadow
2,2,50,5 Black.
Merge all layers together.
Resize 88%
Add copyright info & name.
Save as png.
Thanks for trying my tutorial.

No comments:
Post a Comment