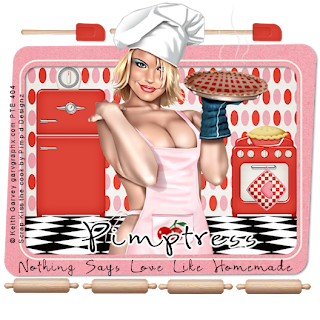
Love Like Homemade
This tutorial was written
by Sarah Fiack on
July 26, 2011
Any resemblance to another
tutorial is purely coincidental.
For this tutorial, I’m using
a tube by Keith Garvey.
You can purchase this tube at
PTE
Supplies:
Tube of choice
Scrap of choice.
I’m using a kit called
Kiss the cook.
It is available at Pimp My Tags
with Scraps
Here
Open a 600x600 new image.
Open your tube & scrap supplies.
Open a frame of choice.
Resize 90%
Paste as a new layer.
Add a drop shadow to
the frame.
2,2,50,5 Black.
Click inside the frame with
your magic wand tool.
Selections modify expand by 3.
Paste a paper of choice as
a new layer.
Selections invert & press delete.
Move the paper under the frame layer.
Now open a floor element.
Paste between the paper &
frame layers.
Position at the bottom of the frame.
Press delete.
Select none.
Open your fridge &
stove oven elements.
Resize both 40%.
Paste in your tag & arrange
so they are "sitting" on the floor layer.
I moved the layers under the
frame layer in my layer palette.
On your main tube,
resize 90%
Paste your tube as the new top layer.
Position in the center of the tag.
Open a pie element.
Resize 25% & 80% once each.
Paste on the stovetop.
Open a timer element.
Resize 20%
Paste on top of the fridge layer.
Now open a hot pad element.
Resize 25%
Rotate Free rotate
right 90
Paste in front of the stove element.
Now taking your eraser tool,
erase part of the hanger of the hot pad.
It may help to zoom in some to see it
better. I zoomed in three times to erase.
Just remember to zoom back to 100%.
Open a rolling pin & spatula elements.
Resize each 35%
Paste the rolling pin 3-4times along the bottom
of the tag.
On the spatula, rotate right 90
Paste 3 times along the top of the frame.
Make sure they are under your main tube layer.
You want the spatulas to appear behind your tube.
Add wordart or saying of choice along
the bottom of the frame.
Merge layers visible.
Resize 88%
Add copyright info & name.
Save as png.
Thanks for trying my tutorial.

No comments:
Post a Comment