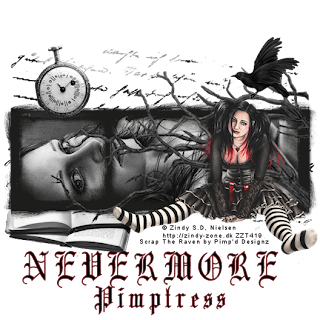
Nevermore
This tutorial was written
by Sarah Fiack on
October 24, 2011
Any resemblance to another
tutorial is purely coincidental.
I am using 2 tubes by Zindy S.D. Nielsen.
You can purchase these tubes at
her store
Supplies:
Tube of choice.
Scrap of choice.
I’m using one by Pimp'd Designz
called The Raven.
It is available at Pimp My Tags
with Scraps
Here
Open a 600x600 new image.
Open up your tubes & scrap supplies.
Open a frame of choice.
Resize 90%
Copy & paste as a new layer.
Using your selection tool, select around
the inside of the frame.You can also use
your magic wand tool. It really depends
on which frame you chose.
Paste a paper of choice as a new layer.
Selections invert & press delete.
Move the paper under the frame layer.
Paste your first tube between the two layers.
Press delete.
Select none.
Add a drop shadow to both the frame
& tube layers.
2,2,50,5 Black.
Open writing print element.
Resize 90%
Paste on the bottom layer of the tag.
Open tree branch element.
Resize 88%
Mirror the element if needed.
Paste along the front right side of the frame.
Open a raven element.
Resize 50% twice.
Position as wanted on the tree branch.
Open your 2nd tube.
Resize 80% twice or as needed.
Mirror the tube & paste in front
of the tag side with the branch.
Choose an open book element.
Resize 50%
Paste on the bottom layer of the tag
above the writing layer.
Position along the bottom of the frame
as wanted.
Open a clock element.
Resize 35%
Paste along the top of the frame
as wanted.
Add wordart or saying of choice
to the tag.
Convert to raster if needed.
Merge layers visible.
Resize 88%.
Add copyright info & name.
Save as png.
Thanks for trying my tutorial.

No comments:
Post a Comment