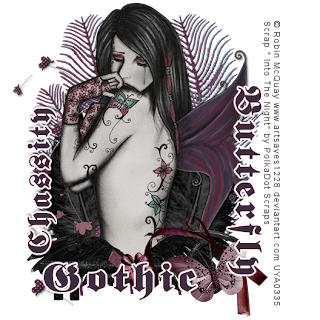
Gothic Butterfly
This tutorial was written
by Sarah Fiack on
April 7, 2011
Any resemblance to another
tutorial is purely coincidental.
For this tutorial, I’m using
a tube by Robin McQuay.
You can purchase her tubes at
UYA
Supplies:
Tube of choice
Scrap of choice.
I’m using one by PolkaDot Scraps
Called Into The Night
It is available at Pimp My Tags
with Scraps
Here
Plugins:
EyeCandy 4000 Gradient Glow -Optional
Open a 600x600 new image.
Open your tube & scrap supplies as well.
Open a tree branch.
Paste on the new image as a new layer.
Duplicate two more times.
Arrange so that there are 3 branches
alongside one another.
On your main tube, resize 88%
Paste on top of the three branches.
Open a set of angel wings.
Resize the wings 70%
Paste at the bottom of your tube.
Open a key element.
Resize 80%
Paste along side the wings layer.
Open a ribbon of choice
Resize 50% Paste on the
tag with one end at the key top.
Open a flower button element.
Resize by 50% twice.
Paste in the center of the wings layers above the key
layer.
Open a feather element.
Rotate 90 left or right.
Paste under your main tube layer
& to side slightly.
You want to position it between the tube & branch layer.
To appear to be coming out from the angel wings
behind your tube.
Duplicate once & mirror.
Open falling leaves element.
Resize 80%
paste as a new layer to the left
& under your main tube.
You want the leaves to appear to be falling
on the side that your tube is facing.
Add a drop shadow to the leaves
2,2,50,5 black
Also add a drop shadow the main tube layer.
Open a butterfly element.
Resize 70% once & 80% once
Paste on the top part of the key.
Add wordart or saying of choice
to the tag on top layer. I did an EyeCandy 4000
gradient glow on each of the two words I did for saying.
Make sure you add a drop shadow as well.
Merge the layers visible.
Resize 88%
Add copyright info & name
Save as png.
Thanks for trying my tutorial.

No comments:
Post a Comment