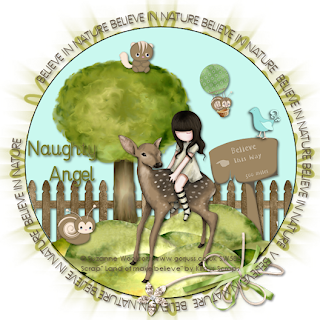
Believe In Nature
This tutorial was written
by Sarah Fiack on
September 13, 2010
Any resemblance to another
tutorial is purely coincidental.
For this tutorial, I’m using
The art of Suzanne Woolcott
You can purchase her artwork at
her site. Gorjuss
Supplies:
Tube of choice.
Scrap of choice.
I’m using one by Kirstys Scraps
Called Land Of Make Believe
It is a PTU kit.
Here
Floralmask3 by Jenny
here
Open a 600x600 new image.
Open tube & scrap supplies.
Select preset shape ellipse - circle.
Color Black. Foreground black
Fill null
Draw out a good sized circle.
Objects align center in canvas
Convert to raster.
Select inside the circle with magic wand.
Selections modify expand 2
Add a new raster layer,
fill with color of choice.
Move under circle layer.
Open a wooden fence.
Arrange 3/4s of the way down the tag.
Selections invert & press delete.
Add a drop shadow.
Paste a small grassy hill at bottom of
circle. Selections invert & press delete.
Do this two more times. Paste each layer
the layer below in layer palette.You want to
move each one up slightly above the
original layer.
Once all 3 layers are done, select the middle
layer, mirror the layer.
Add a drop shadow to each grass layer.
2,2,50,5 Black
Open a tree tube.
Resize 80%
Paste on one of the hills.
Add a drop shadow
Open your main tube.
Resize as above with the tree tube.
Paste on a hill near the tree.
Add a drop shadow.
Open 2 critter tubes.
Resize each of them 20%
Paste on tag as wanted &
add drop shadows to both.
Open wooden sign.
Resize 50%
Paste between the hill layers
on side of tag.
Add a drop shadow.
Open a bird tube.
Resize 20%
Paste as if standing on the wooden sign.
Add a drop shadow.
Open the hot air balloon.
Resize it by 50% twice.
Paste as if flying in the sky.
Oepn one of the critters.
Resize 20% & then 70%.
Paste as if flying in the balloon.
Add a drop shadow to both layers.
Open bow of choice.
Paste as new layer &
position at bottom of tag.
Add a drop shadow.
Open a flower.
Resize 50%
Paste on the bow.
Add a drop shadow.
Add a new raster layer on bottom layer.
Fill with color of choice from tag.
Apply mask.
Merge group.
Resize this layer 125%
Merge layers together.
Draw out another circle like you
did earlier. Make it slightly bigger then original.
Do not convert to raster.
Select font tool.
Put the cursor on the circle.
When the half circle shows up under the A icon,
start typing.
Your font will be on a curve.
Once done with the text,
open up the group in layer palette
& hide the circle layer.
Convert to raster the text.
Add a drop shadow
Resize all layers 88%
Add copyright info & name.
Save as jpeg or png.
Thanks for trying my tutorial.

No comments:
Post a Comment