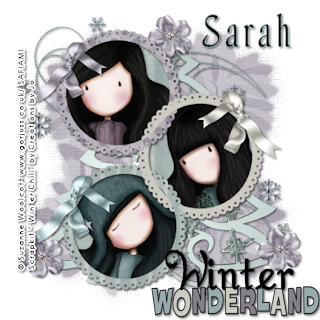
Woolcott Winter Wonderland
This tutorial was written
by Sarah Fiack on
Dec. 4th, 2009.
Any resemblance to another
tutorial is purely coincidental.
For this tutorial, I’m using
The art of Suzanne Woolcott
You need a license to use
Her artwork which can be purchased at
Her site here
Tube was purchased when Suzanne Woolcott was licensed
with AMI.
Supplies
Tube or tubes of choice
Scrap of choice.
I’m using a PTU one called
Winter Chill by
Creations by Jo blog
Vix mask 307
Wordart by wordartworld
here
1) Open a 600x600 new image.
Select a frame of choice.
Resize as needed.
For the frame I chose I resized by 70%.
C/p as new layer onto tag image.
2) Using your magic wand,
Select inside(s) of the frame.
Selections Modify expand by 2.
C/p paper of choice
Selections invert & press delete.
Move under the frame layer.
Do not select none.
3) Paste tube or tubes as new layer.
Position under the frame layer as wanted.
Press delete.
Select none once done.
Add drop shadow to frame & tube
2,2,50,5 black
4) Open a tree element.
Paste as new layer
& position behind the frame.
You should be able to see some of it
Around the frame.
Add the earlier drop shadow.
5) Open a snowflake doodle.
Resize by 50% or as needed.
C/P as new layer.
Position above background layer.
Duplicate once
Mirror & flip the duplicate layer.
Add a drop shadow to both layers.
6) Open a bow.
Resize by 50% & 70%.
C/p as new layers.
Position along frame.
If needed use more then one bow.
This varies on the frame chosen.
Add drop shadow to the bow(s).
7) Open a flower & resize 50% twice.
C/p as new layer.
Move to a corner of the tree
Duplicate twice & move to other corners.
In layer palette move them to above the tree layer.
Add drop shadow.
8) C/p paper of choice on bottom layer.
Apply vix mask 307
Merge group.
9) Resize all layers 88%.
Merge together.
Add wordart of choice.
Resize as needed.
I resized by 15% once
& 50% twice.
Add a drop shadow.
10) Add copyright info & name
Save as jpeg or png.
Thanks for trying my tutorial.

No comments:
Post a Comment